Automatically export images with a frame in Capture One
Introduction
Adding a white or black frame to a picture valorises the picture’s composition and appearance.
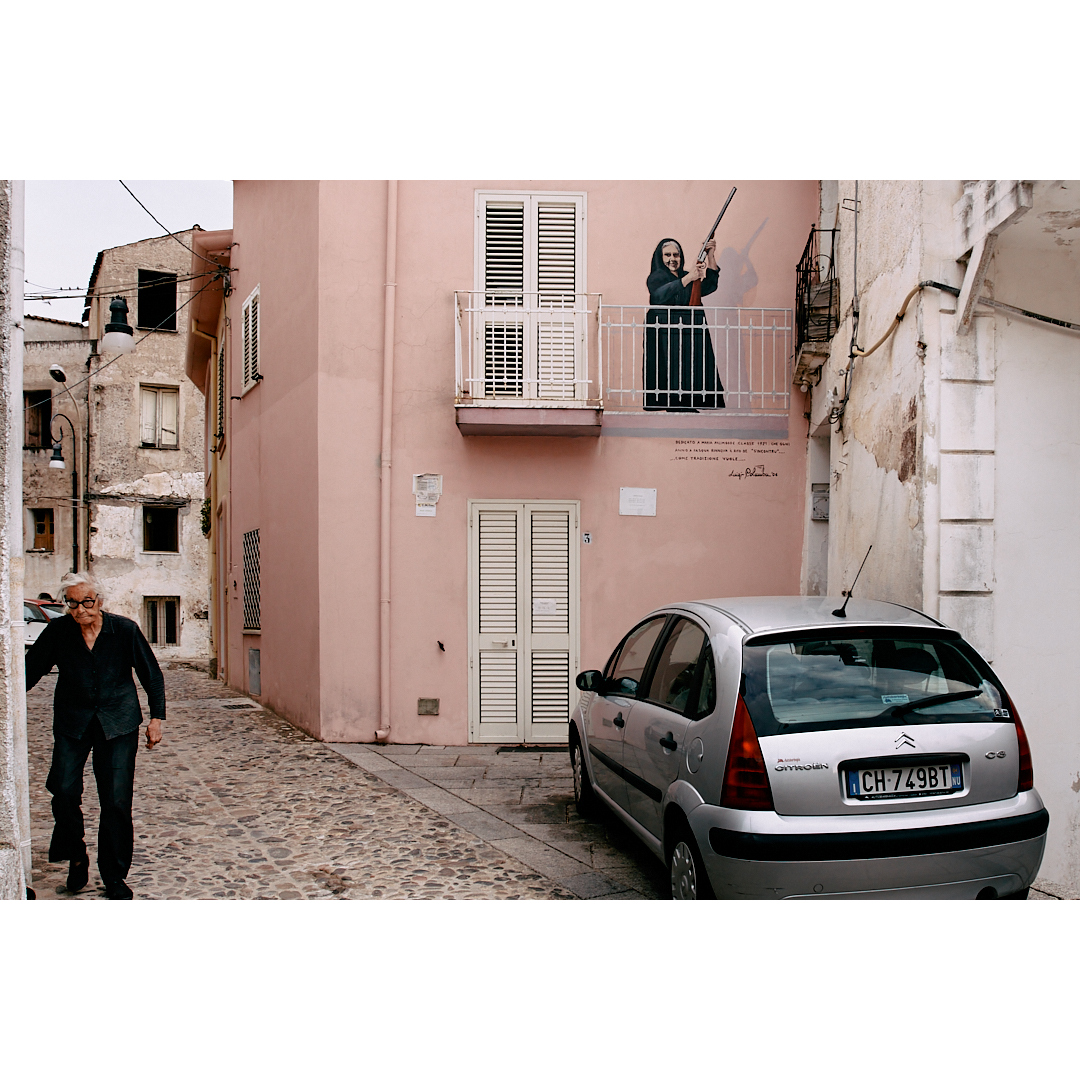
A white frame can also be a convenient trick to post photos in a 2:3 ratio on Instagram without it cropping your photos to fulfil its square format, like in this example. More on that later.
Software presequisites
- You need Capture One.
- You need to install the ImageMagick software suite.
I recommend to install the latter using Homebrew, with this simple command:
brew install imagemagickMore on this here.
- If you are on a Mac, you will use the powerful Automator. If you are on Windows or Linux, you will need to search for a way to render the script that we will write later executable. Herewith, I will refer to Mac instructions only, but it should be straightforward to adapt to the other OS systems.
ImageMagick script
mogrify is the software within the ImageMagick software suite that we will use to create your frame. It will modify the input image file and automatically replace it with the modified version.
Should you want to keep the original file, use convert instead. The commands and the logic of the automation are substantially the same.
mogrify can do much more than adding a frame. Unleash your creativity!
We will use mogrify to create a continuous white frame that is 4% of the image’s x-side and a white frame to fill the y-axis of landscape images to make them appear square to Instagram.
First, you need to know where mogrify is installed. Use the command
which mogrify
This command should output something like /opt/homebrew/bin/mogrify (if you installed mogrify with Homebrew). If you installed the ImageMagick otherwise, still find the path to its installation.
You will need this path to call mogrify in the Automator, otherwise, Automator might not find it.
Continous frame 4% wide
You will need the command:
/opt/homebrew/bin/mogrify -bordercolor white -border 4x% $1
If you try this script in your shell, replace $1 with your filename. In Windows, you shall use %1.
Fill Instagram square format
/opt/homebrew/bin/mogrify -bordercolor white -border x180 $1
The border size rationale will be evident in the set-up of the Export Recipes in Capture One.
Automator app
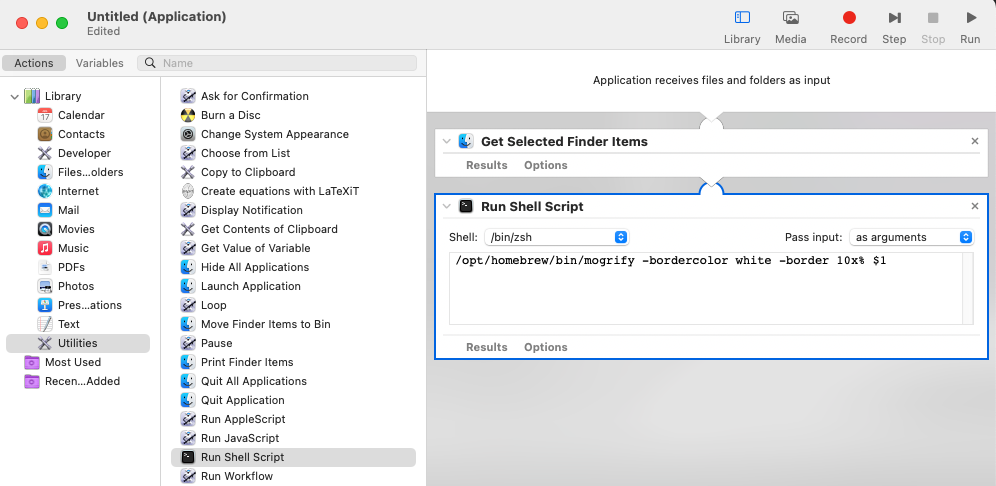
In Automator, select File>New and then choose Application.
In the Library, under Files...olders, choose (double click or drag) Get Selected Finder Items.
Then, again in the Library, under Utilities, choose Run Shell Script.
Replace cat with one of the mogrify scripts above.
In Pass input in the top right of the Run Shell Script window, choose as arguments.
Your app should look like this:

Save the app by editing its name (Untitled in the above image) and choose its destination folder.
You can now test the app by dragging and dropping an image in it.
Capture One Export Recipes
You can now create your Export Recipes for each border type and image format you wish. Each recipe will use the specific app you created with the Automator to create a border with mogrify.
Choose your app in the tab Open with under Format & Size.
How to avoid the Instagram crop
We can now create an Export Recipe that transforms your landscape format pictures into square pictures.
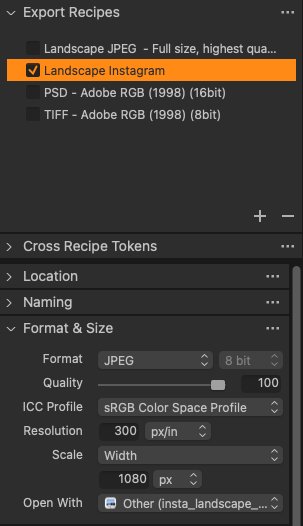
In Capture One, create an Export Recipe that:
- Uses as ICC Profile
sRGB Color Space Profile. That is the color profile used by most browsers (you aren’t printing these pictures). - Has its width set to 1080px. A 2:3 ratio landscape picture will have a 720px height. You need 360px of the white border to make it a 1080px-1080px image. That is why in the mogrify recipe above, you create 180px heigh horizontal borders.
- Open the output file with your Automator app.
Your Export Recipe should look like that:

The output image should look like that:

Grandmas’ fight. Sardinia, Italy